Starting Your Own Restaurant: Avoid a Catastrophe

Starting your own restaurant
This is a sponsored post, and contains my Amazon Associates link.

So you’re a great cook, and you want to take your creations to a larger audience. But are you really ready to start your own restaurant?

Make Sure You’re Ready

So many people want to get into the restaurant industry – but as anyone who’s ever watched Kitchen Nightmares knows, just as many of these restaurants fail because the owners just weren’t prepared to run this kind of business. Running a restaurant can be brutal at the best of times, but if you jump in without the right knowledge and experience, it’s a recipe for disaster (pun intended). You’re going to need to do exhaustive research before you take any steps – if you’re still just at the daydream stage, check out a book, such as How to Start, Run & Grow a Successful Restaurant Business: A Lean Startup Guide Kindle Edition by Tim Hoffman, which is available for free on Kindle Unlimited and Audible. Doing your homework can save you time and money before you go back to school or make other big commitments.

Assess The Area & Competition

You can have the most wonderful restaurant in the world, but if it’s in the wrong location, your restaurant dreams will be over before they even get started. Make sure that your menu and prices are appealing and affordable to your audience – so if you’re opening a pricey, experimental tapas restaurant, maybe don’t open it at a truck stop where people just want to get quick and filling meals! This seems like a no-brainer, but I see so many restaurants make this kind of mistake. Also, opening a restaurant in a building that’s hard to find or out of the way is also going to stack the deck against you.

Get Ready to Launch

So you’ve done your research, come up with the perfect concept, and found the ideal location. Great! But that’s just the beginning. Here’s just a few of the items that will be on your to-do list once you’ve decided to open your own restaurant:

  • Secure financing: Unless you have a substantial amount of money in your savings account, you’ll need to secure a loan in order to open your restaurant. This could range from a general loan to secure the supplies and staff if you’re renting the restaurant space, to financing for the building itself if you’re going to be purchasing the property that the eatery will be operating from. If you’re going for the latter option and you’re based in the Sunshine State, you can start this process with agencies such as The Associates Home Loan of Florida. Psst….some of my favorite restaurants are in Florida!
  • Hire staff: No restaurant can survive without the right staff. Hiring is always tricky; it’s always nice when you can get a direct recommendation from someone you can trust, so put the word out to those in your local network and look into employment agencies and sites like Monster.com‎.
  • Find customers: Much of a restaurant’s success will come from the location and word-of-mouth, and you’ll want to consider what other advertising you may want to pursue, such as your restaurant’s social media presence.

Have you ever considered starting your own restaurant?

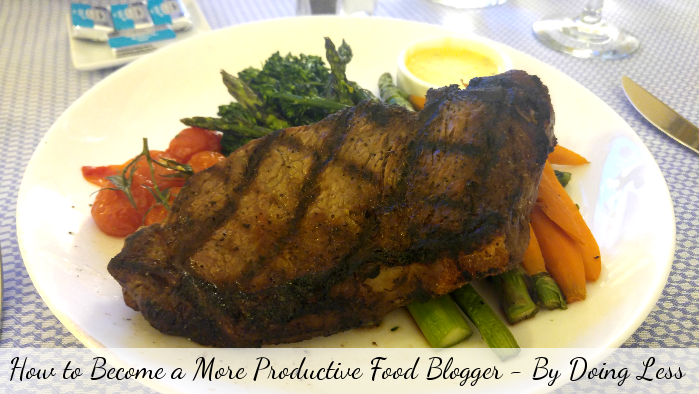
How to Become a More Productive Food Blogger – By Doing Less

How to Become a More Productive Food Blogger - By Doing Less
This is a sponsored post.

In our modern world, we’re all obsessed with trying to figure out how to be more productive – and for someone working in the blogging field, this goes double. Owning a blog means you serve as the writer, editor, photographer, marketer, secretary, bookkeeper and more for your business. With so many aspects of the business to manage, it can and does get very overwhelming trying to keep all the plates spinning. After 11 years in this field, I’ve learned the importance of delegating work whenever possible – and since this isn’t a traditional business with employees, this process works a little differently for us.

What – And How – to Outsource

Running a blog is a unique business model, so it can be hard to know what, or even how, to outsource the workload. These are some common areas where delegating can be a lifesaver:

  • Accounting: I handle my bookkeeping because there’s no real practical way to outsource that, but my accountant takes care of all annual tax-related matters. This saves me a tremendous amount of time, money and stress.
  • Social Media & Virtual Tasks: Having a virtual assistant on hand to help you with day-to-day blogging tasks is an incredible help. Every blogger’s needs are unique, so this varies for each person, but common VA tasks include managing social media channels such as Twitter and other doing day-to-day blogging maintenance.
  • Content: Most successful blogs hire out content creation – some of the top food bloggers have entire recipe development teams. I don’t outsource my own content because Cooking Catastrophe is a very different kind of food blog, and since I came into this field from print journalism, I purposely outsource things I’m not that passionate about specifically so I have more time to write. But for most typical food blogs, having someone work on recipe creation is often essential.
  • Tech: One of my husband’s roles in our business is serving as our in-house, on-call IT person for all my websites and devices, but this is another area in which I am an outlier. For most blogs, having people on hand to handle website design and technical issues is absolutely vital.

How Do You Find an Assistant?

Part of the challenge of delegating tasks is knowing who to hire. For me personally, I hired my accountant based on a recommendation from a trusted friend, and she’s been preparing my taxes for 11 years now. For my virtual assistant, I joined a few Facebook groups for VAs and got lucky on my first try in finding someone absolutely incredible. Ask for recommendations, start small, and take advantage of tools such as password managers to give you control and peace of mind.

But I Can Just Do It Myself!

It’s OK to outsource things you are capable of! For years, I’ve felt like if I could do something, I should do it. I always thought that hiring a third party was something you did when you had a task that you couldn’t complete, but I’ve realized the folly in that. It’s not silly to outsource tasks that you can do; it’s smart! When it comes down to it, bloggers are capable of doing most things relating to our businesses – and that’s how you end up working 24/7. I realized that I was neglecting the most important part of my job, i.e. writing actual content, because I was so consumed with keeping up with the daily grunt work. Sure, XYZ task only takes a short amount of time, but when you add up all those little tasks, the sum total can easily consume most of your day. Delegating some of these jobs has allowed me to focus on the core important aspects of my job, do better work, make more money, and oh yeah – actually take a day off occasionally!

5 Easy Keto Recipes

This is a sponsored post, and contains my Amazon Associates link.

One food trend you may have noticed recently is the ketogenic diet, a low-carb lifestyle that continues to increase in popularity. For the uninitiated, the keto diet cuts out sugar and high-carb foods, focusing instead on things like fresh meats, vegetables and fats. I’ve been experimenting with low-carb eating for the last couple of years, so keto really appealed to me; I started in January and it’s been an amazing experience so far. One thing that has made the transition easier is having a roster of some “Quick and dirty” recipes I can throw together in a pinch; the mental load of starting a new lifestyle is enough to handle without worrying about elaborate recipes on top of it – especially when you’re dealing with the “Keto flu”! So if you’re just starting out, like me, I wanted to share five extremely easy recipes to help smooth your transition into keto:

5 Insanely Easy Keto Recipes

1. Pure BLT

One interesting thing about cutting way down on carbs is realizing how high-carb foods can be completely eliminated from some dishes without changing much of the taste. I was in the mood for a BLT a few weeks ago, so instead of bread, I used a large leaf of romaine lettuce as the “Sandwich”. I squeezed a small line of mayo down the middle of the lettuce, inserted a slice of bacon, and topped with slices of tomato, eating it as a lettuce wrap. And you know what really stood out to me? It was the same experience for me as eating any other BLT, so I didn’t miss the bread – in fact, I could actually taste the flavor of the BLT more without it being smothered in bread.

2. Pork Rind “Sandwich”

On the same theme of deconstructed sandwiches, another quick go-to for me is whipping up tuna or egg salad mixture, then using it like a dip for pork rinds – sort of like a deconstructed sandwich in every bite! This makes for a really fast and brainless lunch. Both salads are made in pretty much the same way regardless of what base you start with. I either grab a can of tuna or 2 hardboiled eggs, and mash in a bowl with mayo, garlic salt and pepper. I like to throw in additional ingredients based on my mood, like chopped green onions, olives, or pickles.

Tip: An Instant Pot is your best friend for whipping up meals in a hurry! I use mine to make batches of hardboiled eggs in pinch – these are great to have on hand for egg salads, quick deviled eggs, or just grabbing a fast snack out of the fridge!

3. Pickle Nachos

Pickle nachos

In true Cooking Catastrophe fashion, I have naturally made a few “Gonzo keto” recipes on the fly. There are many ways to make keto-friendly nachos, the most common method being to use pork rinds in lieu of tortilla chips. However, I found myself in the mood for nachos one evening when there were no pork rinds on hand, so I decided to improvise and see what would happen if I used pickles as the “Chips”. I was pleasantly surprised by how well it worked out!

To make “Pickle nachos”, I lined a baking sheet with foil and greased it. I then cut a pickle into thin slices and layered it on the foil, just like I would with tortilla chips. From there, I layered my favorite nacho ingredients as normal: First, I added a layer of pre-cooked shredded chicken, followed by sliced black olives, chopped onion and cilantro. I coated the nachos with zero-carb hot sauce, then finished with a layer of shredded cheese. I baked the nachos at 350 degrees until the cheese started to brown, and finished with a tablespoon of sour cream. To complete the meal, I served it with a shot of tequila garnished with a lime!

Tip: If you’re in the middle of kto flu, sip a spoonful of the pickle juice while making your nachos to help with electrolytes!

4. Microwave “Nachos”

I was having a case of the Mondays yesterday, and was so spent by 5pm that I had no energy left for meal prep. So I grabbed a microwave-safe dish, layered it with canned chicken, then added avocado slices topped with hot sauce and a final layer of shredded pepper jack cheese. After 2 minutes in the microwave, I had gooey “Nachos” served with a side of sour cream. I won’t win any cooking awards for this one, but if you need something in a pinch when you’re first starting keto, I know you’ll appreciate the idea!

5. Fried Tofu & Spinach

I love one-pan meals like this – simple to make, simple to clean up! For this one, I used a package of cubed tofu that I got on sale, so I didn’t even have to chop it myself; talk about easy. I drained the tofu, and measured out my desired amount according to how many carbs I wanted to budget. Then I melted a pat of butter in a frying pan and added the tofu, flipping it over frequently and cooking until it started to get nice and crispy, adding more butter as needed. When the tofu was close to being done, I added a very generous handful of spinach, stirring until it wilted, then serving. I seasoned the whole dish with garlic salt and pepper since those are my go-tos, but you can use whatever seasoning takes your fancy.

What are your go-to easy keto recipes?

How to Stay Stylish in The Kitchen

This is a sponsored post. All opinions are mine.

There’s an old adage that if you can’t take the heat, you should get out of the kitchen. But sometimes, that’s not an option! If you’ve done much hostessing in your life, you’ve probably encountered the annoyance of slaving over a hot stove for your guests – only to look like a hot mess afterwards. Being a fashionista as well as a foodie, this is simply unacceptable to me, so today I’m sharing my top tips for staying stylish in the kitchen!

Melt Proof Makeup

LipSense

Sometimes, when I open the oven to check on a tray of cookies, I swear I can feel a layer of grease forming on my face, even when I give it a second for the steam to come out before reaching in. Standing over a hot stove, combined with the hustle and bustle of preparing food for a party, is a recipe for your makeup melting right off. Over the years, I’ve built up an arsenal of makeup must-haves that can take whatever I throw at them. I swear by Urban Decay’s Primer Potion to keep my eye makeup from sliding off – it’s truly a miracle product! I also discovered LipSense last year, and I promptly threw away all my other lip colors. LipSense colors stay put unlike anything else I’ve ever used – I can wear a deep red lip color, eat dinner, and my color hasn’t budged. So go ahead, sweat away in the kitchen; your makeup will still look fresh!

Cute Aprons

Flirty cupcake apron

Nothing ruins a cute outfit like putting a huge, shapeless smock over it. That’s why I’m a big fan of cute aprons! I love this cupcake print Flirty Apron that I got as a wedding gift. It’s so cute that it’s a fashion statement all on its own, and bonus – it will keep your dress underneath clean and ready to party once the food is done!

Protect Your Hair

Hair net

A hair net is a necessity in the kitchen, as a hygiene measure to protect the food; and as a style bonus, it also keeps your hairdo protected. Divatress, an online retailer of crochet braids hair and accessories, sell a variety of hair nets that you can use to keep your hair out of your face, and your food! I love that their hair nets are clearly made to be nice and sturdy – when I buy hair nets at the drugstore, they tend to be flimsy and break easily, which is really annoying when your hands are busy cooking.

How do you stay stylish in the kitchen?

Avoid a Catastrophe When Transporting Food: 3 Tips

Sponsored post.

It’s happened to all of us: You bake a beautiful cake to take to a party – only to have the frosting smoosh in transit and ruin it. Whether you’re going to a family reunion, dinner party, or holiday celebration, you probably have to transport food in your car several times a year. So to help you avoid a travel catastrophe, I wanted to share three top tips for making travel-friendly dishes:

Invest in Sturdy, Travel-Friendly Tupperware

I got a nice set of cupcake carriers from a specialty kitchen store as a gift 10 years ago, and I use them constantly! These carriers consist of a standard cupcake pan, a stackable plastic tray that sits on top of the pan, and a large plastic lid that snaps shut over it. This allows the cupcakes to stay securely tucked in the trays, with plenty of space between them and the lid so that nothing gets smashed. I have similar carriers for cakes, which is perfect for birthday parties. Nowadays, you can pick up a simple carrier at Dollar Tree, and it’s very helpful for avoiding the sadness of a smeared cake!

Stacking cupcake trays

Go With Non-Perishable Options

Transporting food doesn’t just pose an aesthetic concern – it can also be a health hazard. Driving around with perishable items can be a recipe for spoiled food, so you need to carefully map out what items you’re taking, how far you’re going, and what you’re going to carry them in to keep them fresh, if it’s an item that needs to stay a certain temperature. When at all possible, non-perishable items are a much easier and safer way to go. Jai and I self-catered our DIY wedding back in August, and since we had a large guest list and limited facilities, we designed our menu to focus on mostly shelf stable items. Since we were having a morning ceremony, this created a perfect opportunity to serve breakfast favorites like bagels, toast, fruit, pastries – we even had a doughnut wall! Our guests had a ton of fun, and we made smart use of the limited fridge space we had available at the venue.

Secure Your Food to Avoid Accidents

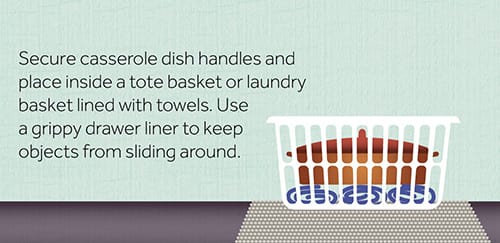
How to secure a casserole dish

Cars.com illustration by Paul Dolan

Smashing a cupcake is sad – but having a piping hot dish spill into someone’s lap is a painful injury. For those instances where you do have to transport a dish that has to stay hot en route, make sure you secure it properly. You might not immediately think of Cars.com when it comes to food tips, but this site is so much more than just data points about automobiles – they also have a blog that covers every aspect of using your car in daily life, including how to travel safely with food. They have a helpful post about traveling with Thanksgiving dishes that has lots of clever tips, including this one about using a laundry basket to secure a casserole dish. Smart!

Do you have any life hacks for traveling with food?

How to Make Frugal Nachos – Recipe + Coupon Codes!

This is a partnered post.

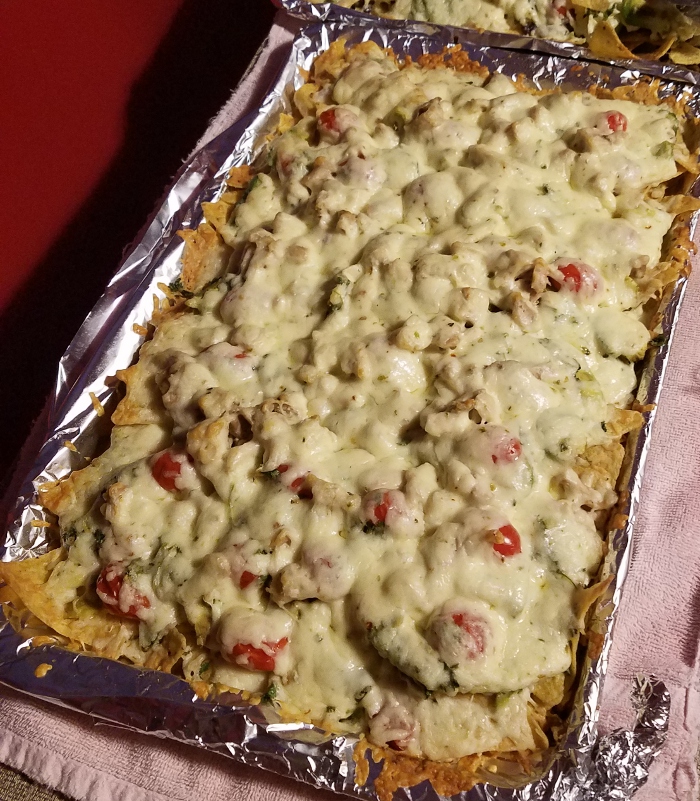
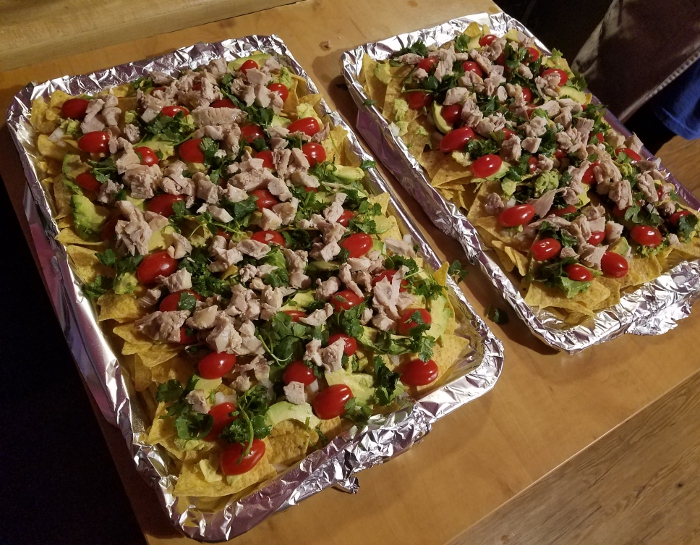
Nachos are one of my go-to “Company best” recipes. Not only do my nachos get a lot of compliments from dinner guests, but they are also an easy one-pan meal and feed a crowd effortlessly. This is my basic nacho recipe that I’ve perfected over the years – please note, I haven’t listed quantities because I always eyeball it and scale up/down depending on how many people I’m serving.

Beeb's Nachos

Beeb's Nachos

Ingredients

  • Tortilla chips
  • Boneless, skinless chicken cut into small pieces
  • Grape tomatoes
  • Avocado slices
  • Chopped yellow onion
  • Black beans
  • Chopped cilantro
  • Shredded cheese
  • Cooking spray

Instructions

Line a baking tray with foil and spritz with cooking spray. (If you prefer cooking oil, dab a small amount on a paper towel and grease the pan that way - you don't need much, just a tad to help prevent sticking.)

Spread a thick layer of chips over the pan, covering it completely. On top of the chips, layer the avocado slices, followed by the beans, chicken, tomatoes, onion and cilantro.

Complete the nachos with a generous layer of cheese that completely covers the ingredients.

Bake at 350 degrees for roughly 20 minutes or until cheese starts to brown lightly.

Serve with salsa, sour cream, sliced jalapenos and/or guacamole!

Schema/Recipe SEO Data Markup by Yummly Rich Recipes
https://www.cookingcatastrophe.com/how-to-make-frugal-nachos-recipe-coupon/

This recipe is also a budget option when you’re serving a group, since it utilizes low-cost ingredients such as tortilla chips and chicken. You can further reduce the cost by stocking up on pantry staples whenever there’s a great sale – that way, you can pull many of the ingredients out of the cupboard at a moment’s notice. And if you’re more into online shopping than schlepping through the grocery store, you can still save; coupons aren’t just for the newspaper anymore!

Groupon
Groupon Coupons allows you to find coupon codes for well over 11,000 online retailers. It couldn’t be easier: Just head to Groupon Coupons before you make an online purchase, and type in the store or product category you’re looking for to see relevant coupons. For example, there is an entire page of coupons for Vitacost.com, where you can snag nacho-making-supplies such as canned beans and cooking oils. One of these coupons will give you an automatic $10 off your $50 Vitacost purchase just in time for stocking up! Click here to view all the current Vitacost promo codes on Groupon Coupons and start saving today.

What’s your favorite frugal recipe? Do you use online coupons to save on your pantry essentials?

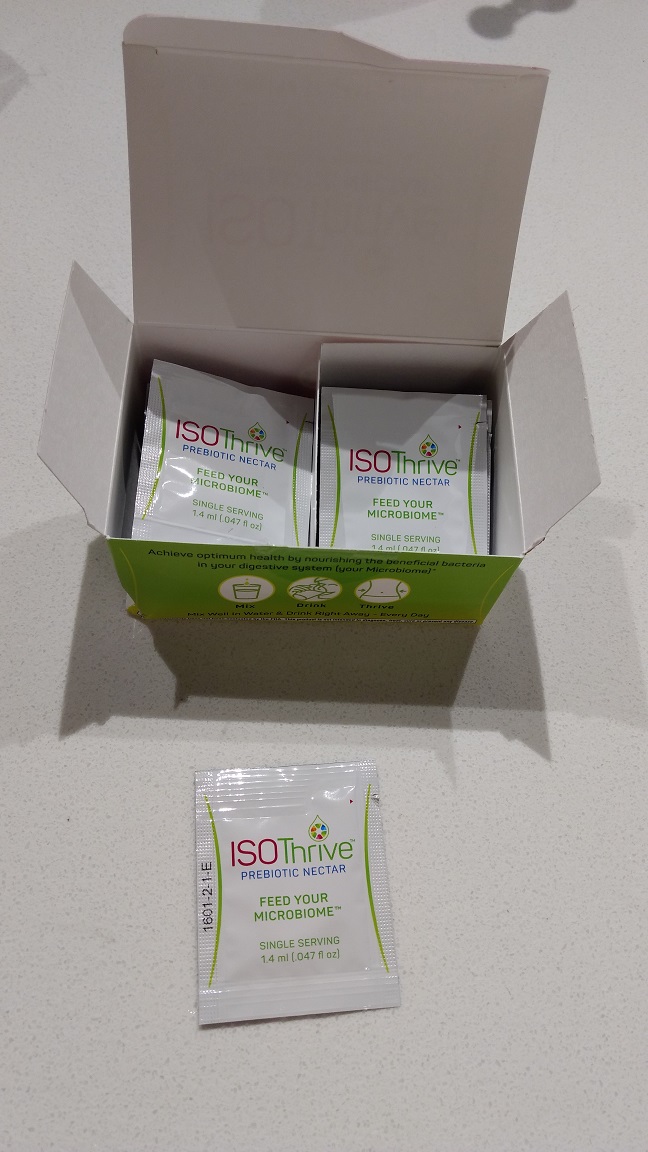
Balance your gut with prebiotics from IsoThrive

IsoThrive
Samples provided for review. This article is not intended to diagnose, treat or cure any condition and is not intended as medical advice. 

As someone with a variety of food allergies and sensitivities, I’m always on the lookout for new ways to balance my bacteria. I love kefir and yogurt, but a lactose intolerance means that those aren’t the right fit for me.

Enter IsoThrive’s prebiotic nectar. It’s non-allergenic; the small packets – taken once daily – can either be added to water, or drunk straight out of the container. They taste fruity and sweet, but not unpleasantly so.

Question: what’s the difference between probiotics and prebiotics? Probiotics are live bacteria that help with digestion; prebiotics are food for the bacteria already in your gut.

Some more about the logic and approach of Isothrive:

“1. Go where probiotics can’t
Most probiotics are neutralized in our stomachs and never make it to our lower digestive tract. To heal GI issues, the whole digestive system has to be re-balanced. A daily dose of fermented microFood like ISOThrive fuels the good bacteria to tackle the organisms that cause acid reflux, constipation, bloating, and gas.

2. Rebalance our diets the ancient way
Most modern diets lack nutrients to feed our “good” bacteria—more particularly, a very specific type of microFood that our ancestors got by eating lots of fermented vegetables or sourdough breads made from heirloom wheat. ISOThrive adds back this bacterially fermented food to rebalance our diets and keep our bacteria happy. (And, no, the sauerkraut on your hot dog or the kimchi on your bibimbap won’t get you the the microFood you need—you’d have to eat several cups of fermented veggies every day to get the same amount of microFood in one 1/4 teaspoon of ISOThrive microFood!)

3. Prep our bodies to prevent disease
Because the modern Western diet is so deficient in specially fermented microFood, our starving “good” gut bacteria are “breaking bad”—adapting to use other energy sources (such as our gut lining), and making us sick. Fermented microFood restores this imbalance, enhancing immune function and staving off disease.”

I’ve been taking the supplements about a week now, and am cautiously optimistic – my digestion does seem to have improved, though I started a probiotic vitamin regimen in the week leading up to taking Isothrive.

All in all, if you’re having problems with food sensitivities and nutrition absorption, I recommend trying Isothrive to see if it works for your system.

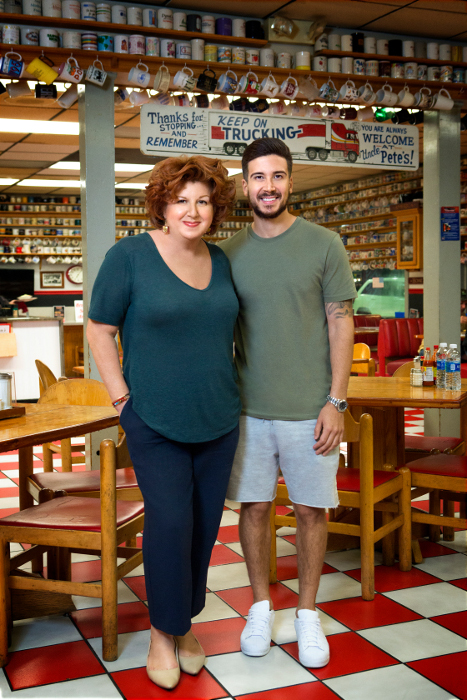
From Jersey Shore to a Foodie Tour: Interview With Vinny & Paola Guadagnino

Paola and Vinny Guadagnino on Cooking Channel's Vinny & Ma Eat America

Photo credit: Cooking Channel

Jersey Shore star Vinny Guadagnino returns to the small screen on January 31st with his own show on The Cooking Channel, Vinny and Ma Eat America. Now it’s all about gym, tan – and linguine! This new series follows Vinny as he embarks on a road trip with his Sicilian mom, Paola, to sample local eats all across America. Paola is the best cook in their family, but has never ventured outside of traditional Italian food, so Vinny hopes to broaden her culinary horizons on this unique adventure. The duo took time out from their travels to dish on their favorite dishes and share a few Italian cooking secrets with me!

Did you grow up cooking with your mom in the kitchen?

Vinny: I can’t say I did much cooking, but I was always in the kitchen waiting for the next meal. My mom really spoiled us with food and my taste buds became spoiled because of it. I think that is why I’m such a foodie today.

Food is usually at the heart of every family gathering. What dishes do you typically eat during a get-together at the Guadagnino household?

Vinny: I try to eat healthy during the week, but my big Sicilian family usually gets together every week for Sunday dinner (my cheat day). And whether there are 3 or 30 people there, there will be a feast on the table. We always start with Italian bread meats and cheeses. Then we move on to a pasta dish such as fettuccini alfredo, baked ziti, farfalle Bolognese, etc…After that it’s a free-for-all where anything could be on the table such as rice balls, meat balls, fried chicken cutlets, mashed potatoes, baked clams and more. Then we move on to fresh fruit to clean our pallet and finally end with Italian pastries and cake for dessert. My favorite is cannoli and tiramisu.

What is your favorite dish to prepare for a family dinner?

Paola: I love making my baked ziti. Even my mom and sisters who are in competition with me admit that I make it the best. I also love making homemade bread and pizza.

What’s the secret to cooking amazing Italian food?

Paola: Lots of love goes into my cooking. We still use our traditional family recipes from Sicily. You can’t get the same thing from any Italian restaurant.

What’s the best culinary tip your mother has given you?

Vinny: When you’re making pasta you should always save a little water on the side that the pasta was boiling in. This way when you need to make the pasta a little moister after you strain it and add sauce, you’re adding water that already has the flavor of the pasta.

Do you have a signature recipe that you like to make?

Vinny: When I was on Jersey Shore we learned how to make Tiramisu from a real chef from Tuscany. I actually kept the recipe with me and still love making it till this day. I even make a low carb version!

Was it hard to convince your mom to branch out and try new cuisines?

Vinny: It was extremely hard trying to get her to eat new things. My mom is very stuck in her ways. She immigrated from Sicily to Staten Island when she was 10 and never left or tried anything new. She’s never even had ranch dressing.

Have you enjoyed trying new foods and flavors? Were there any you’d like to eat again – or avoid at all costs in the future?

Paola: I was very hesitant to try new things. I’ve never really eaten outside of my home before. I wanted to kill my son many times on our road trip when he tried to make me eat certain things. I will say that I actually liked some of the sushi (the cooked sushi.) And my son makes fun of me because I enjoyed Ranch dressing for the first time. I will not be eating any more Rocky Mountain Oysters (bull testicles) or some of the other crazy things that I had to try.

Vinny and Ma Eat America premieres on The Cooking Channel on January 31st!

My 2016 Election Party

This post sponsored by the foundation to give Beeb cookies. I’m Beeb, and I approved this message.

A historic election day has come and gone. This year has made me sorely miss Hunter Thompson; no one else can capture the insanity of this election year the way he could have. Unfortunately, that brilliant writer died in 2005, so you are stuck with this blogger talking about cookie cakes instead.

2016 election party

Last night, I hosted an informal election viewing party where I served these election cookie cakes. The cakes were the brainchild of GourmetGiftBaskets.com, whom I’ve done many product reviews for in the past. I have a rule that if a press release can get me to laugh, I’ll respond, so when they shot me an email asking if I’d like to try these cakes and cast a vote in the “Cookie electoral college”, I had to say yes. Being British, I am not able to vote in American elections, so a symbolic cookie vote is all I could cast. Before you call me lucky for not having to vote this year, may I remind you of Brexit? (If you’d like to make your own Brexit cookie cake, simply break off one cookie piece, throw the rest in a dumpster, and then complain that you’re still hungry.)

On Election night 2008, I was invited to an election viewing party that a friend was hosting. I made election cupcakes, and the host provided red and blue food and cocktails. It was a way to lighten an otherwise tense evening, and Jai and I were glad we went. So I told my BFF to join us last night for to watch the results with a menu of Pinot Grigio, election cookie cakes, Pinot Grigio, chips and dip, Pinot Grigio, pizza, and a little more Pinot Grigio. After all, during times of distress, everyone needs comfort food.

2016 election cookie cakes

I received cakes bearing the likenesses of three candidates, which had arrived in mid-October as an advance preview sample; I wanted to save them for election night, so I froze them, and it worked beautifully! I’m mentioning this because I specifically Googled “Can you freeze cookie cakes” and got no real results, so hopefully I will now be the #1 result for this highly competitive keyword. Freezing didn’t have any effect on the frosting, and they all tasted great, so if you’ve ever laid awake at night wondering the answer to that question, now you know. Anyway, back to the election (if we must):

The Cookie Cakes

President-elect Donald Trump:

Donald Trump Cookie Cake

Campaign slogan: “Make America a cake again & grab ’em by the cookies”

Hillary Clinton’s cake appears to be the victim of a literal smear campaign – art imitates life, etc…

Hillary Clinton cookie cake

Campaign slogan: “I should have deleted the cookies off my private server”

We even had a third party option with Gary Johnson:

Gary Johnson cookie cake

Campaign slogan: “I don’t know what a cookie cake is”

Unlike this election year, these cookies didn’t leave a sour taste in my mouth. All three were a tasty bipartisan treat!

Presidential Cookie Cakes, For Your Election Catastrophe

This post sponsored by the foundation to give Beeb cookies. I’m Beeb, and I approved this message.

This election year has been full of doom and gloom. If you’re looking for something sweet to get the sour taste out of your mouth, then check out these hilarious cookie cakes as a salve for your electile dysfunction:

Election cakes

Yes, that’s right: You can now buy cookie cakes bearing the likeness of Hillary Clinton, Donald Trump, or Gary Johnson – sorry, Jill Stein, looks like you’ve been forgotten again. These cookie cakes are the brainchild of GourmetGiftBaskets.com, who have also set up an online “Cookie Tuesday” poll…think of it as FiveThirtyEight, but for cookies. I’ll let their amusing press release explain further:

“Given the bitter nature of this year’s U.S. Presidential Election, GourmetGiftBaskets.com launched two polls as part of its Presidential Cookie Cake Campaign to sweeten the deal for the electorate a few weeks ago.

The popular online retailer has declared today “Cookie Tuesday” – the day when results from these polls can be revealed, showing what voters (and cookie lovers) are really thinking. The first poll, representing the Cookie Campaign’s popular vote, shows Donald Trump with 44% of the total, Hillary Clinton with 42%, and Gary Johnson with 14%. These results reflect the preferences of over 2,000 adults who have visited the voting site to date.

The second poll was meant to delve into the sentiments of voters in each state, as well as the District of Columbia. Nicknamed the GourmetGiftBaskets.com Electoral College, it surveyed over 1,200 adults at 51 companies, ranging from Mom & Pop establishments to Fortune 100 corporations. A company in each state was sent three, 10-inch cookie cakes, featuring caricatures of each candidate. The first cake to be eaten was declared the winner of that state.

Trump won 209 electoral votes, triumphing in 25 states, while Clinton had 184 votes, emerging victorious in 17 states. Clinton came out on top in some surprise states, including often-conservative Texas, while Trump won in Massachusetts, a liberal-leaning state.

But neither candidate acquired the necessary 270 votes to actually win the Electoral College, as Gary Johnson claimed a whopping 145 votes, and controlled several “swing states,” including Ohio, Florida and North Carolina.

Comments from the Electoral College voters showed three distinct camps: staunch Clinton supporters, pro-Trump evangelists, or working people who really disliked both of them. Some said that they didn’t even know who Johnson was, but were willing to go with the unknown over Clinton or Trump.

“With just a week before the official election, the GourmetGiftBaskets.com polls truly reflect how close this race is – as well as some disappointment over the choices we have for President,” said GourmetGiftBaskets.com’s Vice President of Sales and Marketing Jason Bergeron. “And these polls demonstrate that Gary Johnson has the potential to steal vital votes from either camp, something that Trump and Clinton supporters have feared, and for good reason.”

To learn more about GourmetGiftBaskets.com’s Presidential Cookie Cake Campaign (#CookieCakeElection), or to voice your choice in the ongoing popular vote, click here. If the Cookie Cake Campaign popular vote changes dramatically in the next week, the company will issue another update to the media.

If you’re interested in ordering your own Presidential Cookie Cake or sending one to a friend, loved one, or even someone who disagrees with your political views, please go here. Each cake is only $34.99 and ships for free.

Finally, if you’re planning an election night party and want to order all three cookie cakes to stage your own mini-elections, you can purchase them together for just $79.99 with free shipping (a savings of nearly $25).

Disclaimer: GourmetGiftBaskets.com, its partners, vendors and subsidiaries are not affiliated with, sanctioned by, or endorsing any candidate. This Presidential Cookie Campaign and the associated polling are strictly being done for fun.”

As a non-US-citizen, the only vote I’ll be able to cast this year is in the Presidential Cookie Campaign, so I’ve already submitted my (somewhat begrudging) cookie ballot. No matter which candidate you choose in this race, it’s a vote to “Let them eat cake”! I received all three of these cakes in the mail, which I’ll be enjoying on election night along with a stiff drink or two. Watch this space to see my review, assuming the apocalypse is not unleashed on November 8th and I still have an Internet connection.