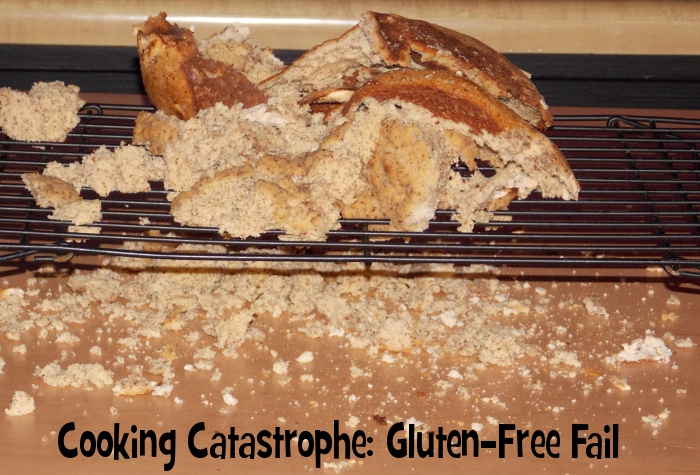
Gluten-Free Fail

Gluten-Free Fail

I totally thought I was on to a winner, you guys.

Back in 2010, I received a bag of coconut flour to test out, and I had wanted to make a loaf of bread with it. After doing a bit of Googling, I found that all the recipes were for loaves made by hand – none for a breadmaker, which is what I use primarily because it’s awesome and easy. Since I couldn’t find any bread machine recipes at all, I adapted one of my favorite breadmaker recipes to include coconut flour, and it was a resounding success; to this day, it’s one of my most-visited posts.

However, my recipe only uses partial coconut flour in conjunction with all-purpose flour. Flash forward to this June, when I attended a panel hosted by reality star Tenley Molzahn. Tenley has health issues that have led her to maintaining a gluten-free diet, and after the panel was over she stuck around to chat with attendees and answer questions about gluten-free living. Someone brought up coconut flour, and I had a chance to ask her about how I might create a gluten-free version of my coconut flour breadmaker loaf. Tenley had some great suggestions and recommended almond flour in place of the all-purpose flour, so when I got home from the conference, I ordered a few bags off Amazon.

This seemed like a brilliant idea: My original coconut flour recipe is years old at this point, from before I had a decent camera – heck, I’m pretty sure that post even pre-dates Pinterest. It was about time to update my recipe anyway, and I had grand visions of my beautiful bread, photographed with an angelic glow under summer sunlight. Plus, since this version would be gluten-free, my friends with dietary restrictions would be able to enjoy it, too! This was gonna be great!

So tonight, I made my recipe as normal, except this time I used 2 1/2 cups of almond flour in place of all-purpose flour. I put it in the breadmaker on “Bake Rapid”, and while it smelled great, it completely fell apart when the timer was up and I put it on the cooling rack. I thought, “Maybe it tastes better than it looks,” but no – it tastes awful, too! This happened to me the last time I tried to make coconut flour without gluten, although that time I used 100% coconut flour which was just asking for trouble.

I’m trying to figure out where I went wrong this time. Obviously, Tenley didn’t know what exactly was in my recipe – for all I know, I may have used way more almond flour than you’re supposed to. Or maybe it didn’t cook long enough, and I should avoid rapid bake mode? Or I’m missing something else?!

Gluten-free friends: Do you have any advice as to how I could make this recipe work without all-purpose flour? I have enough almond flour to try again, but since it’s expensive I’d hate to waste the rest of it on another flop!

Making Homemade Laundry Soap With Fels-Naptha

Making Homemade Laundry Soap With Fels-Naptha

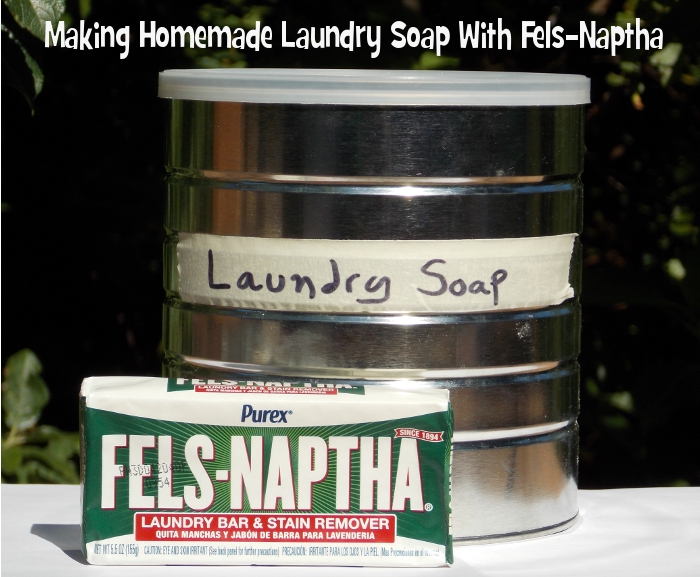
I was provided with a complimentary Purex Fels-Naptha Laundry Bar & free coupons for review.

Last month, I tried my hand at making homemade laundry soap for the first time. It was straightforward to do and worked out well, so when I received a Fels-Naptha bar in the mail, I knew immediately that I’d be putting it to use in my next batch. The recipe from DIY Natural that I go by advises either using a bar of Fels-Naptha or Ivory soap; I’d only tried the Ivory soap thus far, so I was eager to see how this would compare.

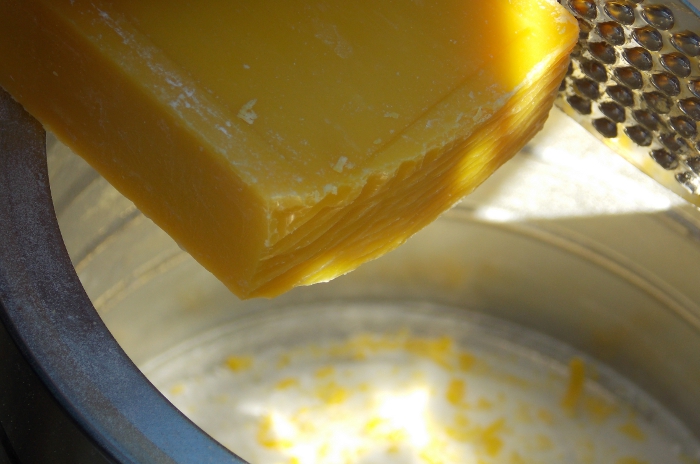
Grating Fels-Naptha for my homemade laundry detergent

To prepare my soap, I added Borax and washing soda to a washed out coffee can that I’ve been using to store my homemade detergent in. Normally the recipe calls for 1 cup of each ingredient, but I only had about 3/4 cup of washing soda left and I didn’t feel like making another batch, so I just scaled the other ingredients down accordingly. If you don’t know how to make washing soda, click here!

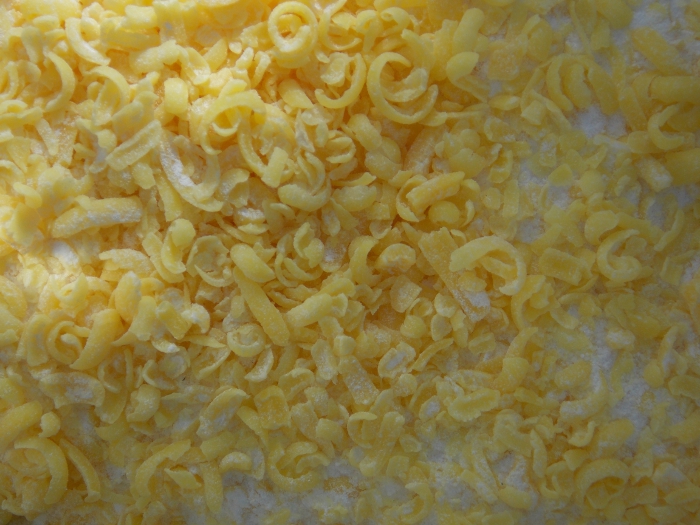
Once those ingredients had been added, I shaved 3/4 of the Fels-Naptha bar into the canister using a cheese grater. This laundry bar is yellow, so it almost looks like cheese while you’re doing it. 😉

Fels-Naptha shavings

Then, I took a large spoon and mixed the ingredients together for 5 minutes. Done! DIY Natural recommends using 1-2 tablespoons per load, depending on how soiled your laundry is. I’ve run several loads of laundry with my new Fels-Naptha laundry soap concoction, and I’m pleased; it’s not really scented, but the laundry comes out with a fresh, “Clean” smell. And I still have a quarter of the bar left, so the next time I have an item with a stain on it, I’m going to try using this to treat it – it’s meant to be a good pre-treatment for stains as well, so I’ll be curious to see how it works in that regards.

National Mustard Day at The National Mustard Museum – August 3rd, 2013

National Mustard Day

Since this is a post about National Mustard Day at the National Mustard Museum, I am being compensated for this post with bottles of mustard. 😀

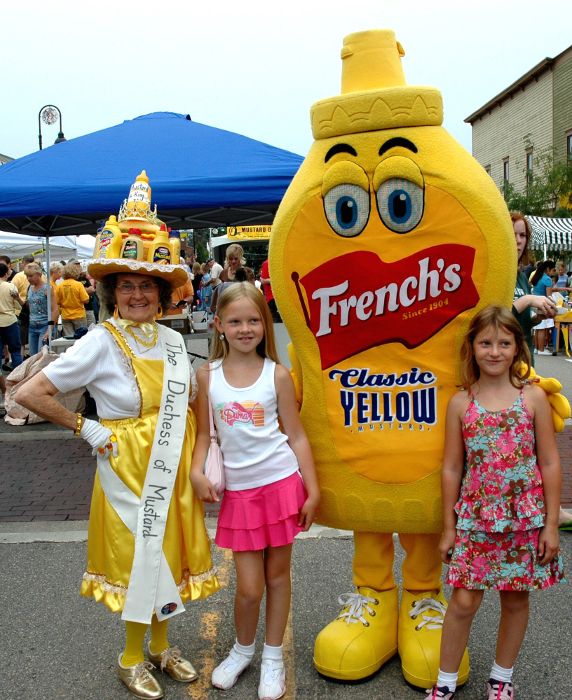
Did you know that there is such a thing as the National Mustard Museum? This new museum is based in Middleton, Wisconsin and is the most comprehensive building dedicated to this condiment that I’m aware of! And what better way to celebrate than with a big party on – you guessed it – National Mustard Day, which takes place from 10 AM to 4 PM on August 3rd, 2013. There will be opening ceremonies presided over by “Dr. Mustard” and appearances from the Oscar Mayer Weinermobile and the French’s Mustard Man – no word on if the Duchess of Mustard will be in attendance – along with magic, music from the Red Hot Horn Dawgs (I wonder if they’ll play “Mean Mr. Mustard”?), a “Mustard games” fundraiser, free mustard samples, and free hot dogs (Donations encouraged). They do note that mustard is required on the free dogs; but really, if you don’t like mustard, why would you go to the National Mustard Museum in the first place?

If you want to check out all the mustard fun, you can click here for more details on the event. If I were near Wisconsin I would so be there! If you’re too far away to visit, like me, then you can visit Frenchs.com for mustard recipes you can make this Saturday to commemorate National Mustard Day at home.

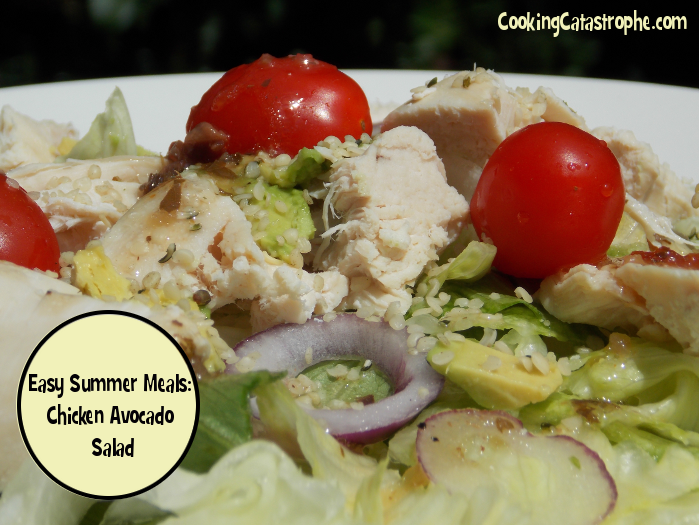
Easy Summer Meals: Chicken Avocado Salad

Chicken Avocado Salad
Finding truly easy recipes can be more challenging that I’d expect. Sometimes, I’ll be reading a “Quick and simple” recipe that cheerfully informs me that it has only an hour and a half of prep time. Which is great, but I’ll be sitting there thinking, “I haven’t even had time to shower today, and you want me to spend half an hour chopping asparagus?” So, I thought it would be only appropriate to share some of my “No-brainer” recipes on here. When I say quick…I mean really quick!

The chicken avocado salad which I’m about to share with you is great because it’s simple, full of veggies, and ideal for hot summer days when you really don’t want to turn on the oven. I will also be sharing hints on how to make a big batch ahead of time so that you’ve got salad ready to go all week – summer always seems to be crazy, so if you’re looking for a quick option to serve your family on hectic evening that doesn’t involve a trip through the drive-thru, this might help.

Chicken Avocado Salad

Ingredients

  • 1 package of boneless, skinless chicken breasts, boiled
  • 1 head of lettuce
  • 1 jalapeño
  • 1 red onion
  • 1 avocado
  • 1 package of grape tomatoes
  • 1 packet of hemp seeds
  • Salad dressing

Instructions

  • Chop lettuce head and add finely chopped jalapeño and red onion to taste. Top with chunks of avocado, grape tomatoes, and chopped chicken. Finish with a sprinkling of hemp seeds and your favorite salad dressing.
https://www.cookingcatastrophe.com/chicken-avocado-salad/

How to Make This Salad in Bulk & Save Time

As I mentioned above, I make a big batch of this salad all at once so that Jai and I have an easy meal we can grab all week. Here’s how I keep the salad fresh while cutting down on prep time:

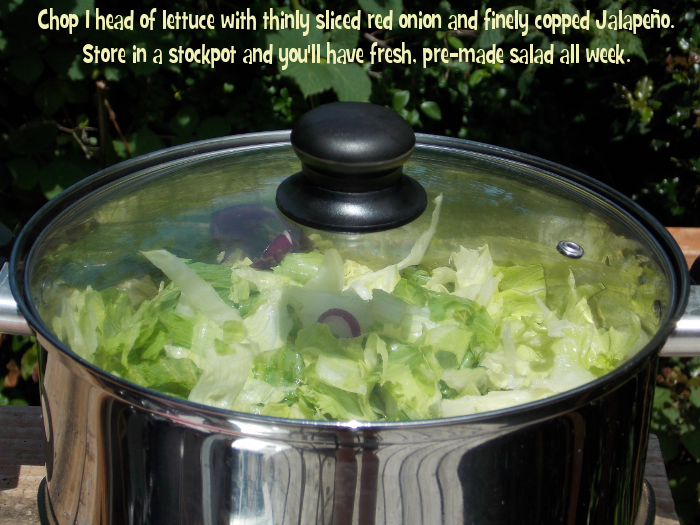
Make-ahead salad
Chop 1 head of lettuce with thinly sliced red onion and finely copped Jalapeño. Store in a stockpot and you’ll have fresh, pre-made salad all week.

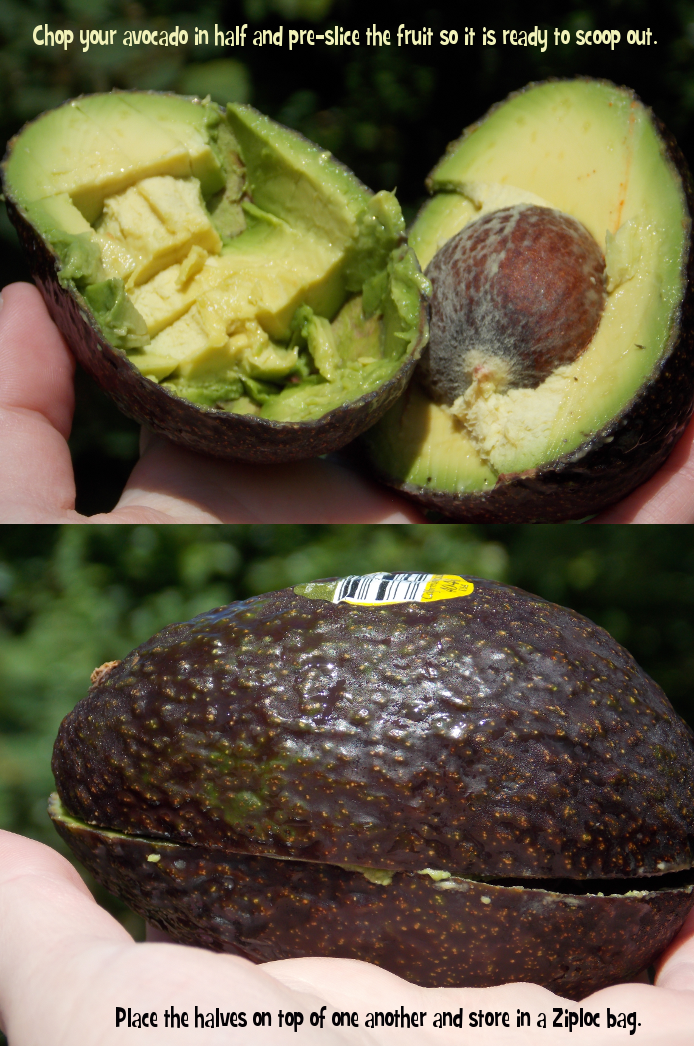
Preparing avocado
Chop your avocado in half and pre-slice the fruit so it is ready to scoop out; place the halves on top of one another and store in a Ziploc bag.

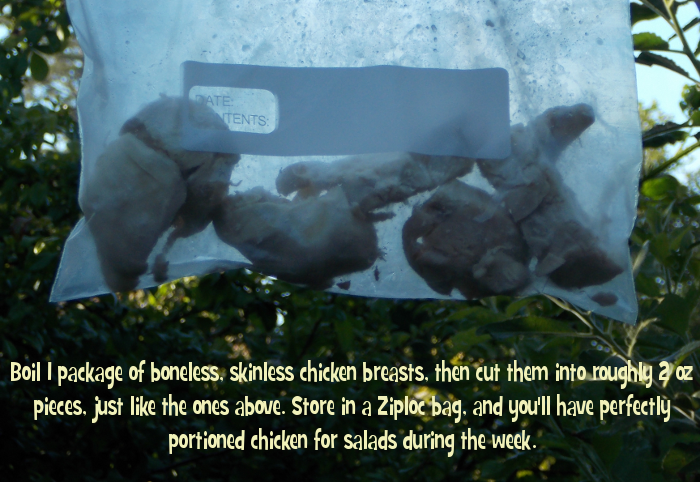
Boiled chicken breasts
Boil 1 package of boneless, skinless chicken breasts, then cut them into roughly 2 oz pieces, just like the ones above. Store in a Ziploc bag, and you’ll have perfectly portioned chicken for salads during the week.

When you’re ready to eat, just grab your stockpot full of salad and dish up a plate. Top it with one of your chicken portions – you can tear or chop it up on your plate – then add avocado and a few grape tomatoes; I store a container of pre-washed tomatoes in my fridge so they’re all ready to go. Top it off with a sprinkling of hemp seeds and dressing. Done!

Nutrisystem-Friendly: This salad is great if you’re following the Nutrisystem program – I chop each chicken breast into 2 oz pieces since that’s equal to one PowerFuel on the plan. Then I can just grab one out of the bag and know that it’s already been weighed and is ready to go. 1 tablespoon of both avocado and salad dressing count as a limited “Extra”; I’m not sure about the hemp seeds, but I personally treat them as an extra just like sesame seeds – you could easily omit them, however. I’d highly recommend trying this salad with your lunch, especially if you’re just starting Nutrisystem, since it’s so tasty and you can really bulk it up with veggies to fill yourself up.

So there you have it: One of my go-to, easy summer meals. What simple recipes do you like to make during this time of year?

Simply Potatoes Review

Simply Potatoes Hash Browns

Samples provided by Simply Potatoes for tasting!

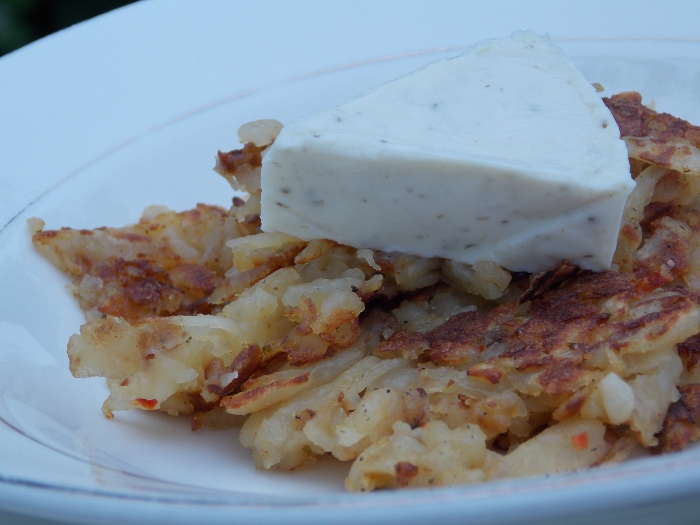
Simple meals are always a winner for me, and it’s a bonus if I can avoid heating up the oven during the summer. I’ve been a fan of Simply Potatoes for a few years now after seeing how easy they are to prepare, so when I was offered a couple of bags to try out in my summer meal prep, I was all for it. For Sunday brunch – aka I’ve been up all night editing PHP templates and haven’t had time to eat – we whipped up a batch of Simply Potatoes Southwest Style Hash Browns and served with a wedge of cheese on top. The cream of the cheese nicely complimented the spicy flavors in the hash browns!

I also tried out a bag of Diced Potatoes with Onion, which sounded really good to this onion-lover. According to the directions, you should cook this in a non-stick pan covered with a lid, and since I don’t have any frying pans with lids that fit properly, I thought I’d just cook it in a pot with a lid instead. I didn’t think through the fact that it is not a non-stick pot, so I ended up burning the dish. The potatoes were crispy, but oh well, they still tasted good. 😉 I used olive oil in lieu of the vegetable oil suggested on both packages of Simply Potatoes, and also added some chopped up, leftover chicken to the pan of diced up potatoes to round it out as a meal. Just like Mama June, I’m a fan of multi-meals!

How do you keep your kitchen cool in the summer?

Classic Catastrophe: The Epic Sugar-Free Cake Disaster of 2004

The Epic Sugar-Free Cake Disaster of 2004

August brings a lot of birthdays in my circle of family and friends, and since I love to bake, I’m often known to whip up a cake or two for the occasion. Jai’s Grandpa was one of these August birthdays, and before he passed away in 2009 I would sometimes bake sugar-free items for him due to his diabetes. The first time I attempted this was for a family gathering in 2004, where he and Grandma (Also an August baby) were having a joint birthday party. My grand plan was to bake a regular cake for her and a sugar-free cake for him. What could go wrong?

I started baking my cakes the night before the party. A good friend of mine was staying with me in preparation for a flight the next morning, where she would be catching an early-morning plane to France to attend school for a year. Since we were heading out in the wee hours of the morning to get to the airport, we decided not to bother going to bed since we’d only catch about an hour of sleep anyway. Since we were up, I decided to start whipping up my cakes.

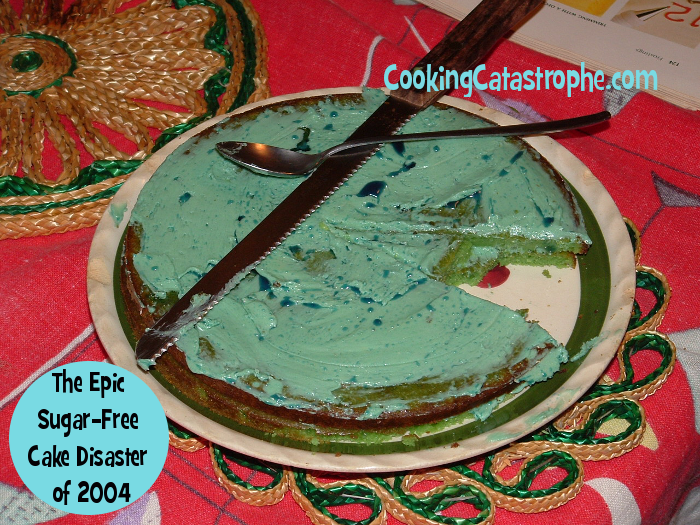
Utilizing a box of Splenda made for baking, I set about creating my diabetic-friendly cake. At some point while mixing up the batter, I made a few substitutions – I don’t recall exactly what, but I have the tendency to adapt recipes as I go. To make it extra pretty, I added some food coloring – just like those adorable cakes you see on Pinterest! Except something went horribly wrong while it was in the oven. Whatever clever tweaks I had made to the recipe hadn’t agreed well with the Splenda, and I ended up with two cake layers that were flat as a pancake in addition to being tinted a lovely shade of moldy green. Mmmmm!

What was my thought after seeing this abomination? Maybe it will look better when I frost it. That’s 2 AM logic for you! So in a last-ditch attempt to save this sorry cake disaster, I tried making sugar-free frosting. I soon realized how ill-prepared I was for this, seeing as most frosting recipes which I had used prior to that point were 90% powdered sugar. I believe I tried combining the Splenda with margarine to make the frosting, adding in some blue food coloring to compliment the swamp green shade of the cake. I’m guessing the mixture of oil caused the food coloring to form droplets on top of the frosting. At this point, I could see that it was pretty hopeless, but since I’d already come this far I figured, “I may as well frost the thing and see how it looks.” At this point, my friend was cracking up and told me: “I love that you just keep going with this.”

As you can see from the photo, we were actually brave enough to try a tiny bite just to see how bad it was…and yes, it was terrible. It wasn’t fit for human consumption, but the birds enjoyed the crumbs when I threw them outside. I had to take a picture before tossing it because it made me laugh so much! The second creation I made was a regular, full-sugar cake for Grandma – a chocolate and white marble cake that actually looked really nice, but I didn’t think to take a photo of that one because it wasn’t funny. I’ve gotten a pretty good system down for sugar-free baking since that time, but this first attempt was definitely one of those “It’s the thought that counts” moments!

What’s your most memorable cake disaster? Have you ever had an epic flop with sugar-free baking?

FitBloggin’ Swag Snacks Reviewed

Love for Lenny And Larry

Yes, FTC, as the title implies, these snacks all came in my swag bag at FitBloggin’, AKA free – score! And as you might have gathered, everyone got swag bags, so no one was expecting me to write anything or pose in my super awesome shirt while eating my tasty brownie. 😉 If I thought being a food blogger was hard, being a fashion blogger would have to be the hardest. I might be a major fashionista, but when I think of all the work that goes into posing for beauty fashionshoots all I can do is give huge props. So, you will have to forgive me for looking like the blurry FitBloggin’ zombie in this one – I’ll call it interpretive art since that’s kind of how I feel after conference week. ANYWAY!

So Lenny & Larry are two cool dudes that make “Muscle Brownies” packed with protein. I got a few of these to taste test in my swag bag and they’re quite nice – they come in flavors like Triple Chocolate and Cookies & Cream, which are sweeter than you’d expect for this type of snack/meal replacement. I love easy meal options like this during zombie week after a business event!

I also had a chance to try Hemp Hearts for the first time this past week via Manitoba Harvest. I wasn’t sure what to expect, but these are like a nutty seed – it reminds me a bit of pine nuts. I’ve been stirring these into my Power Pak Pudding and it’s pretty good that way – I’d like to try them on a salad next.

We also got a few sticks of Simply Snackin’ jerky, and oh boy, were these a hit! Jai is a big jerky fan (Jerky boy?!) so he quickly set about eating one of the chicken breast varieties – don’t ask me which, he ate it before I could check 😉 – and very much enjoyed it. I tried the Dried Beef Sirloin and was really impressed at how soft it was – my main problem with jerky is that I feel like I have to break my jaw in half to eat it. This was moist and effortless to eat as well as being delicious. I’m impressed!

And there you go – the tastes of FitBloggin’, reviewed! I love trying new food so it’s fun to go to an event like this where there are new-to-me eats everywhere.

FitBloggin’ Food: Laughing Cow Snack Break

Beeb and The Laughing Cow

As a live blogger for FitBloggin’, I received complimentary admission. The giant cow gave me some free cheese, but he didn’t ask me to write anything. 😉

One of the tasty snack breaks at FitBloggin’ 2013 was hosted by The Laughing Cow. The host with the most was Mr. Cow himself, who posed for photos with all the hungry attendees!

Laughing Cow snack break

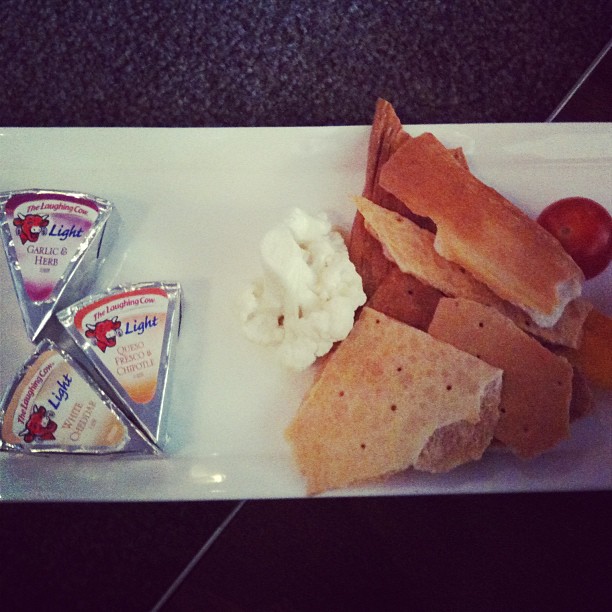
After hugging Mr. Cow, I got myself a plate of cheese, homemade crackers and fresh veggies. So good! I was in a rush to get to my next session so I didn’t have much time to eat, and I ended up throwing a few foil packets of cheese into my purse to eat later. Latop…makeup…cheese…yep, my purse has everything. 😉

Laughing Cow Expo Hall Table

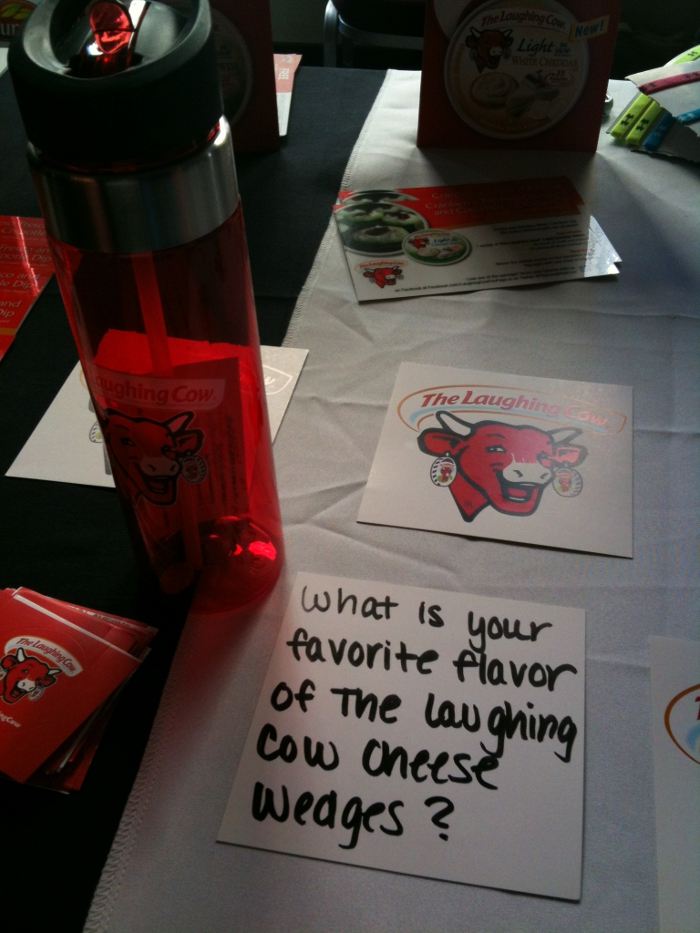
The Laughing Cow also had a table in the Expo Hall where they were handing out coupons and hosting a fun “Trivia” game. I flipped a card and got the best question ever: What is your favorite flavor? For answering, I had my choice of prize and picked this sweet Laughing Cow water bottle. And in case you’re wondering: The answer is Light Garlic & Herb, in case it ever comes up in Trivial Pursuit. 😉

FitBloggin’ Food: Powered by Soy Protein

Powered by Soy Protein

As a FitBloggin’ live blogger, I received complimentary admission to the conference and Expo Hall samples. No one asked or expected me to write anything about these foods that I tasted. But as a blog about food, I’d be remiss to eat something new and not share my thoughts on it!

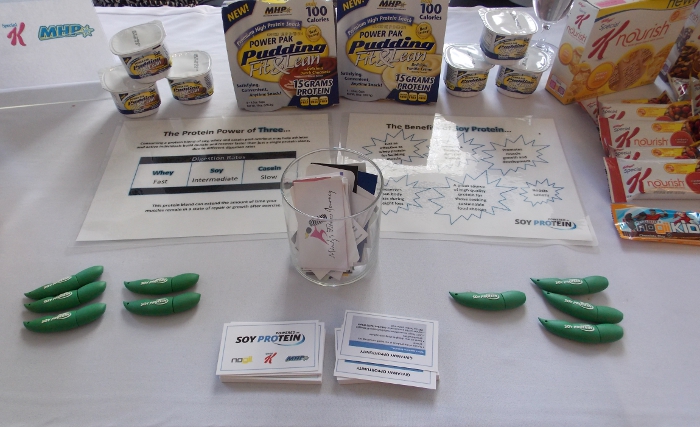
One of the Expo Hall tables I visited at FitBloggin’ last week was Powered by Soy Protein by Guiltless Plate. They had a variety of samples to taste, most of which were new to me. I was introduced to Fit & Lean Power Pak Pudding, a 100 calorie snack with 15 grams of protein. Right away I thought this could be a good morning snack for us, since we still adhere to the “PowerFuels” and “SmartCarbs” concept that worked so well for us on Nutrisystem. We’ve been trying both flavors this week – as a confirmed chocoholic that flavor is by far my favorite, but the vanilla is still pretty good too.

Special K Nourish

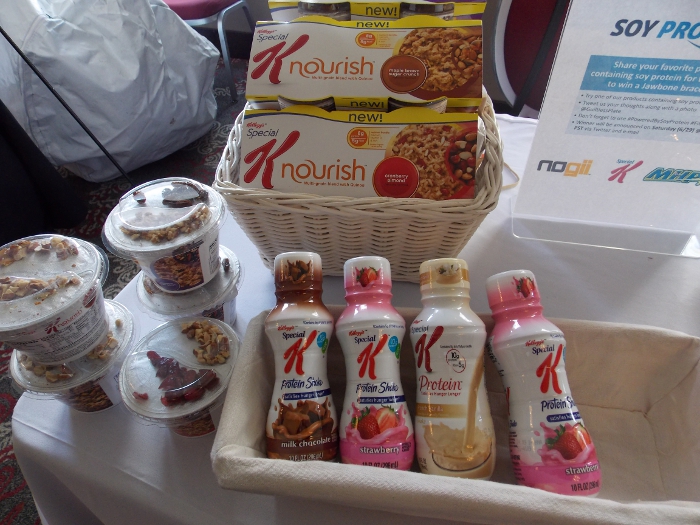
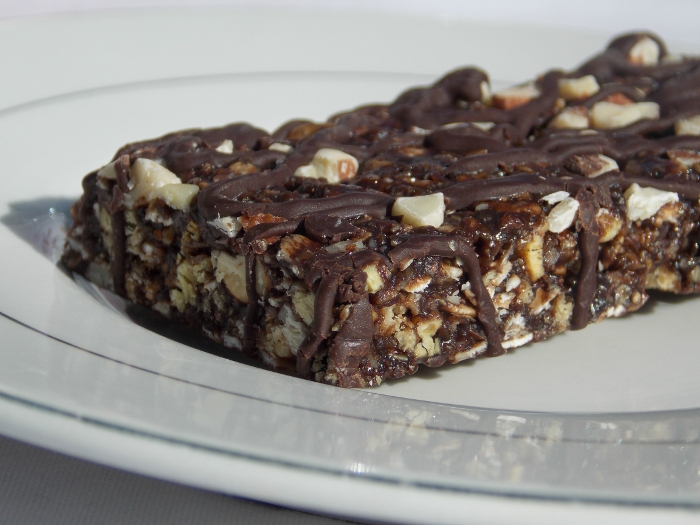
There were also a selection of products from Special K, including their protein shakes that we have literally been drinking all week to their new Special K Nourish line of cereals and bars. We’ve been sampling quite a few of the Nourish meal bars, including the Dark Chocolate Nut Delight:

Dark Chocolate Nut Delight

Yum!

NoGii

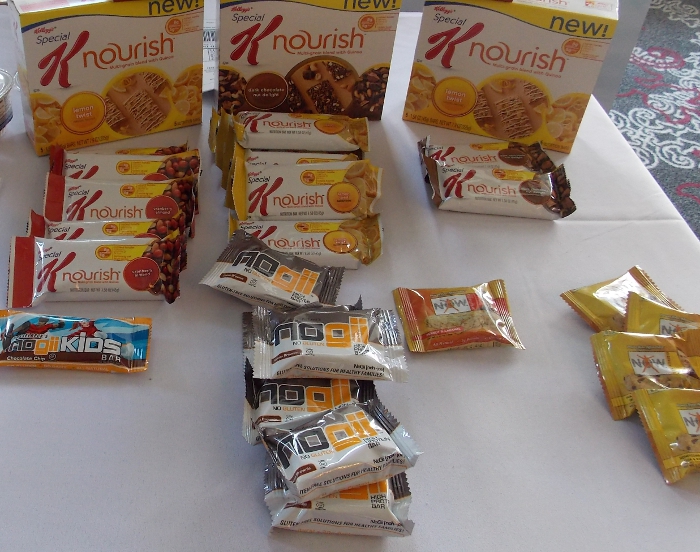
Now, I also received a selection of NoGii and Now bars to sample, but someone *coughcough* Jai *coughcough* ate them all before I tried any. I showed him this picture and said, “Hey, how did these taste?” He looked concerned and said, “I didn’t eat those”. After some back and forth, I realized that he thought I was implying that he had eaten every bar on the table in this picture. 😉 One we cleared THAT up, he said: “Oh yeah, they were good. I liked them so much that I ate all the ones you brought home.” MEN! In all fairness, he also added that they were “Granola-ish with a hint of sweetness”. I will take that as a compliment since they disappeared pretty darn fast!

FitBloggin’ Food: Blue Diamond Snack Break

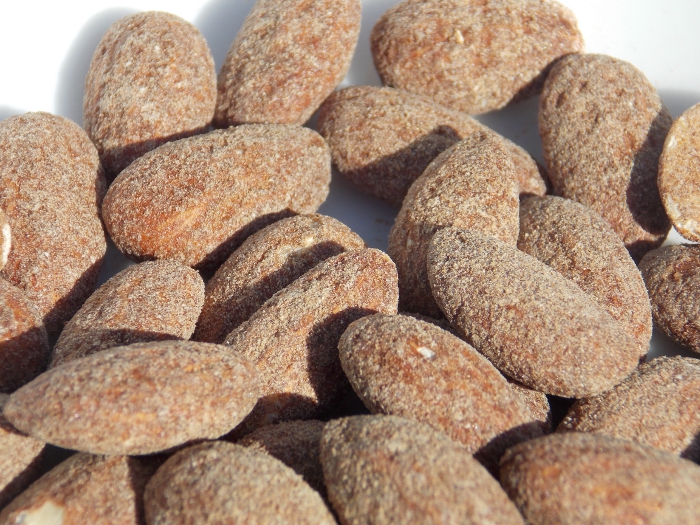
Blue Diamond Roasted Cofee Almonds

I received complimentary admission to FitBloggin’ as a live blogger. Blue Diamond provided attendees with samples. No post requested or required; I just like to write about new food, seeing as this is a food blog and all. 😀

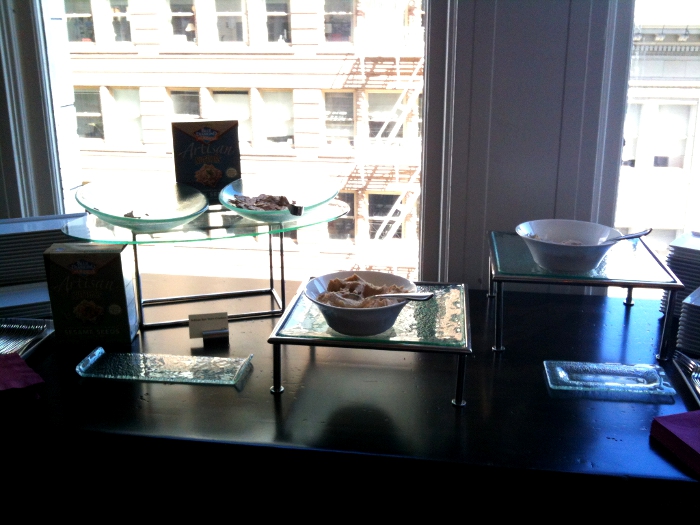
This year’s FitBloggin’ featured a variety of “Snack breaks”, hosted by event sponsors. With such a jam-packed schedule of activities and workouts, it was great to have a bit of a breather built in where we could refuel before heading on to the next panel. Blue Diamond Almonds hosted one of these breaks during the first day of the conference, where we had a selection of hummus & crackers to choose from.

Blue Diamond snack break

Yep, crackers! These are the newest offering from Blue Diamond – Artisan Nut Thins. They were super tasty – I ended up getting a box of the Flax Seeds variety to take home, and it was one of the first snacks we devoured upon returning. Mmmm!

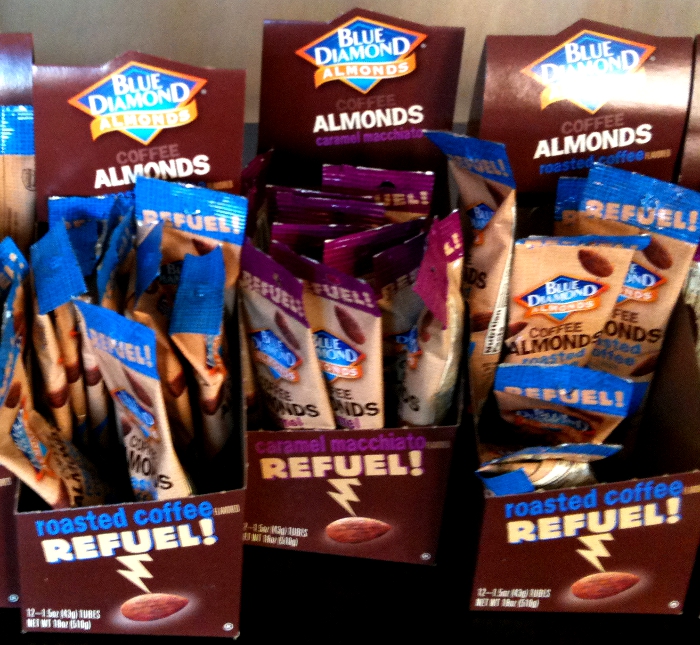
Blue Diamond - Refuel!

During the break, they also offered us samples of their new coffee-flavored nuts. You heard me right! I got packets of Roasted Coffee (Which is what I photographed at the top of the post), Mocha, and Caramel Macchiato – I’m a coffee fiend so these were right up my alley.

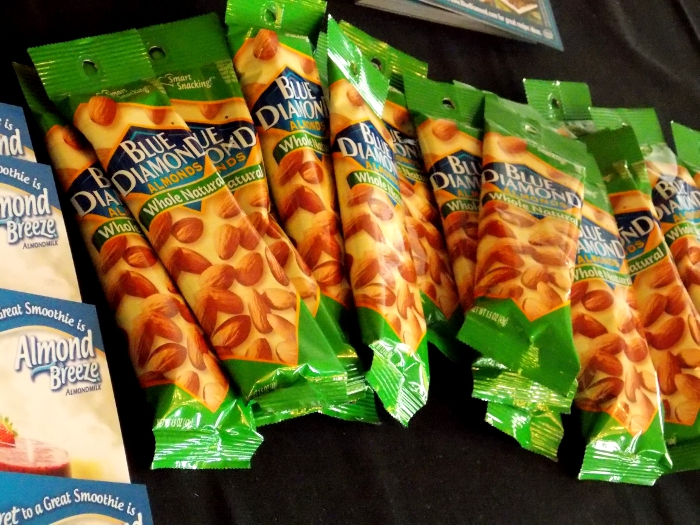
Blue Diamond Expo Hall Table

Blue Diamond also had a table in the Expo Hall on Friday and Saturday with more samples to taste. Besides the classic plain variety, I also took home some Coconut, Blueberry (Which Jai loved), and my favorite, Salt ‘n Vinegar – one of my most-loved chip flavors!